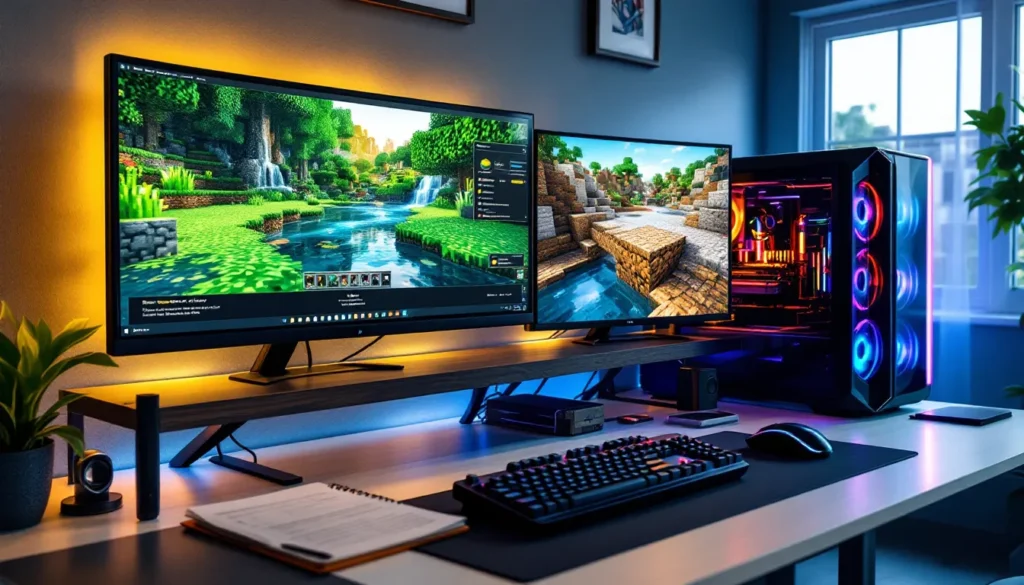
Default Minecraft has charm, no one’s denying that. The simple, blocky aesthetic is iconic, instantly recognizable, and runs on a potato. But after you’ve built your hundredth structure and explored your fiftieth biome, those 16×16 textures can start to feel… well, dated. That’s where realistic texture packs come in, turning grass blocks into lush photorealistic lawns, stone into weathered rock with depth and detail, and water into mirror-smooth reflective surfaces that look ripped from a AAA title.
In 2026, realistic texture packs have evolved beyond simple retextures. With support for PBR (physically-based rendering), advanced normal maps, and seamless integration with ray tracing shaders, Minecraft can look more like Uncharted than a blocky survival game. Whether you’re a content creator hunting for that perfect screenshot, a builder looking to showcase your mega-builds, or just someone who wants to experience Minecraft in a completely new way, realistic texture packs deliver a visual overhaul that’s hard to go back from.
This guide covers everything: what makes a texture pack “realistic,” the best packs to download right now, how to install them across Java and Bedrock editions, system requirements to run them smoothly, and how to pair them with shaders for maximum visual impact. Let’s immerse.
Table of Contents
ToggleKey Takeaways
- Realistic Minecraft texture packs transform the game’s visuals from 16×16 flat textures to high-resolution 128×1024+ photorealistic details with PBR support and material depth, dramatically enhancing immersion and atmosphere.
- Top realistic texture packs like Realism Mater, Stratum, and Ultimate Immersion cater to different hardware levels, offering visual upgrades ranging from aggressive photorealism to balanced realism that maintains performance on mid-range systems.
- Pairing a realistic texture pack with ray-tracing shaders like SEUS PTGI or Continuum RT can elevate Minecraft’s visuals to rival AAA game quality, though this requires high-end GPUs (RTX 3060+) and significant VRAM allocation.
- System requirements scale with resolution: 256×256 packs need 8GB RAM and GTX 1660-class GPUs, while 512×512+ packs demand 16GB+ RAM and RTX 3060-class GPUs; GPU VRAM is the critical bottleneck, with higher-resolution packs consuming 5–10GB alone.
- Installation differs between Java Edition (straightforward with Optifine support for advanced features) and Bedrock Edition (limited to .mcpack format without native shader support), making Java the preferred platform for realistic texture pack users.
- Optimization through RAM allocation, render distance reduction, Optifine tweaks, and strategic shader configuration can unlock 10–30 additional FPS, making realistic texture packs playable on less powerful hardware without sacrificing visual impact.
What Are Realistic Minecraft Texture Packs?
Realistic texture packs replace Minecraft’s default textures with high-resolution, photorealistic alternatives designed to mimic real-world materials. Instead of the flat, simple textures Mojang ships with the game, realistic packs layer in detail: individual grains in wood planks, moss growing on cobblestone, reflective properties on metal blocks, and subtle color variations across stone.
Most realistic packs come in resolutions ranging from 128×128 to 1024×1024 pixels per block, compared to the default 16×16. Higher resolutions mean more detail, but they also demand more VRAM and processing power. Modern realistic packs also support PBR textures, which include normal maps (for surface depth), specular maps (for reflectivity), and roughness maps (for material finish). When paired with compatible shaders, PBR textures enable dynamic lighting, realistic reflections, and material interactions that respond to in-game light sources.
Not all realistic packs aim for the same look. Some go full photorealism, making Minecraft look like a nature documentary. Others strike a balance, keeping some of Minecraft’s blocky charm while adding realistic detail and depth.
How Realistic Texture Packs Differ from Default Textures
Default Minecraft textures are 16×16 pixels and hand-painted with a deliberately simple, stylized look. They’re optimized for performance and instant readability, you can spot diamond ore from a mile away. Realistic texture packs flip that priority: they sacrifice the simple aesthetic for visual fidelity.
Here’s the breakdown:
- Resolution: Default is 16×16. Realistic packs range from 128×128 to 1024×1024 or higher.
- Detail layers: Default textures are single-layer images. Realistic packs use multiple texture maps (diffuse, normal, specular, roughness) to simulate depth and material properties.
- Color palette: Default textures use saturated, high-contrast colors for clarity. Realistic packs use muted, natural color grading that matches real-world materials.
- Performance impact: Default textures are lightweight. Realistic packs can eat 4GB+ of VRAM and require shader support to look their best.
The shift is dramatic. Grass goes from a flat green texture to individually rendered blades with color variation. Stone transforms from a simple gray pattern into layered rock with cracks, weathering, and shadow depth. Water becomes a reflective, translucent surface instead of an animated blue tile.
Why Gamers Choose Realistic Texture Packs
Enhanced Immersion and Visual Experience
Minecraft’s gameplay loop, mining, building, exploring, doesn’t change with a realistic texture pack. But the feeling does. Walking through a birch forest with photorealistic bark textures, dappled sunlight filtering through leaves, and moss-covered ground creates an atmosphere the default game can’t touch.
Realistic textures make environments feel lived-in and grounded. A castle built with realistic stone bricks and weathered wood beams looks ancient, like it’s been standing for centuries. A modern skyscraper with glass, concrete, and metal textures feels sleek and futuristic. The increased detail helps players connect emotionally with their builds and the world around them.
For survival players, realistic packs add weight to exploration. Descending into a cave with realistic stone walls, dripping water, and dim torchlight feels tense and atmospheric in a way vanilla Minecraft doesn’t. Every biome becomes a photo opportunity.
Better for Screenshots and Content Creation
If you’re a YouTuber, streamer, or just someone who loves sharing builds on Reddit or Discord, realistic texture packs are a game-changer. High-resolution textures combined with shaders produce screenshots and footage that look cinematic, seriously, some Minecraft screenshots in 2026 rival pre-rendered game art.
Content creators use realistic packs to:
- Showcase builds in their best light: A detailed medieval village or modern mansion looks exponentially better with realistic materials and lighting.
- Create thumbnails that pop: Photorealistic visuals grab attention in a sea of default-textured content.
- Produce cinematic machinima: Filmmakers in Minecraft use realistic packs and shaders to create short films with movie-quality visuals.
- Stand out in build competitions: Many building communities and servers now expect high-quality screenshots, and realistic packs deliver.
Even casual players enjoy the satisfaction of capturing a beautiful sunset over their base or a dramatic cliffside build that looks like concept art.
Top Realistic Texture Packs to Download in 2026
Realism Mater: Industry-Leading Photorealism
Realism Mater (formerly known as UMSOEA) is the gold standard for photorealistic Minecraft textures in 2026. Available in resolutions up to 1024×1024, it delivers uncompromising visual fidelity with full PBR support. Every block has been meticulously crafted to look like its real-world counterpart: stone has visible mineral deposits, wood grain is detailed enough to see growth rings, and metal blocks reflect light with physically accurate properties.
Realism Mater requires a beefy system, expect to allocate at least 8GB of RAM to Minecraft and have a GPU with 6GB+ VRAM. Performance-conscious players can download the 256×256 or 512×512 versions, which still look incredible but run significantly smoother.
The pack pairs best with ray tracing shaders like SEUS PTGI or Continuum RT, where its PBR maps really shine. It’s a top choice for content creators who need the absolute best visuals and don’t mind the performance hit.
SEUS PTGI and Ray Tracing Compatibility
SEUS PTGI (Sonic Ether’s Unbelievable Shaders Path Traced Global Illumination) isn’t a texture pack, it’s a shader, but it deserves mention here because it’s designed to work hand-in-hand with realistic texture packs. SEUS PTGI uses path-traced ray tracing to simulate real light behavior: global illumination, realistic shadows, and material-accurate reflections.
When combined with a high-res realistic texture pack like Realism Mater or Stratum, SEUS PTGI transforms Minecraft into something that rivals modern AAA games. Sunlight bounces off water, illuminates caves naturally, and casts soft shadows through leaves. The pack is available on the modding community alongside other visual enhancement tools.
Requirements are steep: NVIDIA RTX 3060 or better, 16GB+ system RAM, and Java Edition with Optifine. But the results are jaw-dropping.
Stratum: High-Resolution Realistic Textures
Stratum is another heavyweight realistic pack, offering resolutions from 256×256 to 2048×2048. It leans heavily into natural, earthy tones and is especially praised for its terrain textures, grass, dirt, stone, and sand all look photorealistic without being overly saturated.
Stratum’s strength is versatility. It works beautifully with shaders but still looks solid in vanilla lighting. The pack is regularly updated to support new Minecraft blocks and biomes, making it a safe long-term choice. The 512×512 version hits a sweet spot between visual quality and performance, making it accessible to mid-range PCs.
Download options include bundles with custom sky textures and connected textures (via Optifine), which remove repetitive tiling and make large surfaces look seamless.
Ultimate Immersion: Balanced Realism for Performance
Ultimate Immersion is the go-to pack for players who want realistic visuals without melting their GPU. Available in 128×128, 256×256, and 512×512 resolutions, it delivers a noticeable upgrade over vanilla textures while keeping performance in check.
The pack takes a “grounded realism” approach, textures are detailed and lifelike but not aggressively photorealistic. Colors are slightly stylized to maintain Minecraft’s readability, making it easier to spot ores and navigate environments. It’s a solid choice for survival players who want immersion without sacrificing FPS.
Ultimate Immersion runs well on systems with 8GB RAM and a mid-tier GPU like the GTX 1660 or RX 5600. It pairs nicely with lighter shaders like BSL or Complementary, which provide visual enhancement without the performance cost of ray tracing.
How to Install Realistic Texture Packs in Minecraft
Step-by-Step Installation Guide for Java Edition
Installing a realistic texture pack on Java Edition is straightforward, but shader and mod compatibility add extra steps. Here’s the full process:
- Download the texture pack: Find your chosen pack (from CurseForge, Planet Minecraft, or the creator’s site) and download the
.zipfile. Don’t extract it. - Locate your resource packs folder: Open Minecraft, go to Options > Resource Packs > Open Pack Folder. This opens the folder where Minecraft stores texture packs.
- Move the file: Drag and drop the downloaded
.zipfile into the resource packs folder. - Activate the pack: Return to Minecraft. The pack should appear in the left column under “Available Resource Packs.” Click it, then click the arrow to move it to “Selected Resource Packs.” Click Done.
- Install Optifine (recommended): Most realistic packs require Optifine for features like connected textures, custom sky, and PBR support. Download the correct Optifine version for your Minecraft release from optifine.net, run the installer, and select “Install.” Launch Minecraft using the Optifine profile.
- Add shaders (optional): Download a shader pack, place the
.zipin the shaderpacks folder (accessible via Options > Video Settings > Shaders > Shaders Folder), then select it in the Shaders menu.
Restart Minecraft if textures don’t load immediately. Higher-resolution packs may take longer to load on first launch.
Installing Texture Packs on Bedrock Edition
Bedrock Edition (Windows 10/11, Xbox, PlayStation, Switch, Mobile) has a more locked-down system, but texture pack installation is still simple:
- Download a Bedrock-compatible pack: Not all packs work on Bedrock. Make sure the download specifies
.mcpackformat. - Import the pack:
- PC/Mobile: Double-click the
.mcpackfile. Minecraft should auto-import it. - Console: Transfer the file via the Minecraft Marketplace or use cloud storage (Xbox supports OneDrive: PlayStation requires USB transfer).
- Activate the pack: Open Minecraft, go to Settings > Global Resources > My Packs, select your texture pack, and click Activate.
- Apply to a world: Create a new world or edit an existing one. Under Resource Packs, add the pack to the active list.
Note: Bedrock Edition does not natively support shaders. Some packs include built-in lighting adjustments, but for true shader effects, you’ll need third-party tools (on mobile) or stick to Java Edition.
System Requirements for Realistic Texture Packs
Recommended PC Specs for Smooth Performance
Realistic texture packs are resource-intensive, especially at higher resolutions. Here’s a breakdown by pack resolution and target performance:
For 128×128 to 256×256 packs (smooth 60+ FPS):
- CPU: Intel i5-10400 / AMD Ryzen 5 3600 or better
- GPU: NVIDIA GTX 1660 / AMD RX 5600 XT (4GB VRAM minimum)
- RAM: 8GB system RAM: allocate 4GB to Minecraft
- Storage: SSD recommended for faster texture loading
For 512×512 packs (stable 60 FPS with shaders):
- CPU: Intel i7-11700 / AMD Ryzen 7 5800X
- GPU: NVIDIA RTX 3060 / AMD RX 6700 XT (6GB+ VRAM)
- RAM: 16GB system RAM: allocate 6–8GB to Minecraft
- Storage: NVMe SSD for minimal stuttering
For 1024×1024+ packs with ray tracing (30–60 FPS):
- CPU: Intel i9-12900K / AMD Ryzen 9 5950X
- GPU: NVIDIA RTX 4070 / AMD RX 7800 XT (8GB+ VRAM)
- RAM: 32GB system RAM: allocate 10–12GB to Minecraft
- Storage: NVMe SSD essential
These are recommendations for smooth performance. You can run realistic packs on weaker hardware, but expect lower FPS and longer load times. Performance analysis from DSOGaming shows that texture resolution has a bigger VRAM impact than shader complexity, so prioritize GPU memory if you’re upgrading.
GPU and RAM Considerations
VRAM is the bottleneck for realistic texture packs. A 512×512 pack can consume 4–6GB of VRAM alone: add shaders and you’re easily over 8GB. If your GPU runs out of VRAM, Minecraft will stutter, textures will pop in slowly, or the game will crash.
VRAM usage by resolution:
- 128×128: ~2GB
- 256×256: ~3–4GB
- 512×512: ~5–6GB
- 1024×1024: ~8–10GB
- 2048×2048: 12GB+
System RAM allocation is equally important. Minecraft runs on Java, which needs memory headroom. Allocate at least half your total RAM to Minecraft when using realistic packs. Players with 16GB should allocate 6–8GB: those with 32GB can go 10–12GB.
To allocate more RAM, edit your Minecraft launcher profile: go to Installations > [Your Profile] > More Options, then change the -Xmx value (e.g., -Xmx8G for 8GB). Don’t allocate all your RAM, leave some for your OS and background apps.
Optimizing Performance While Using Realistic Textures
Adjusting Graphics Settings for Better FPS
Even with solid hardware, tweaking Minecraft’s settings can squeeze out 10–30 extra FPS:
- Render distance: Drop this to 12–16 chunks. Realistic packs load a lot of data per chunk: reducing render distance helps.
- Smooth lighting: Set to Minimum or Off if not using shaders (shaders override this anyway).
- Particles: Reduce to Decreased or Minimal. Fire, water splashes, and block-break particles add up.
- Clouds: Turn off. Shaders usually replace them.
- Entity shadows: Disable if using shaders with built-in shadows.
- VSync: Turn off and cap FPS manually (via Optifine or shader settings) to reduce input lag.
- Mipmapping: Set to 0 or 1 if you experience texture flickering. Higher values smooth distant textures but can cause issues with some packs.
Monitor your FPS with Optifine’s built-in counter (enable in Video Settings > Other > Show FPS). Aim for a stable 60 FPS minimum: dips below 30 make gameplay uncomfortable.
Using Optifine and Performance Mods
Optifine is mandatory for realistic texture packs. Beyond enabling connected textures and PBR support, it includes performance optimizations: better chunk loading, dynamic lighting, and smart rendering that skips invisible faces.
Key Optifine settings to adjust:
- Fast Render: Turn Off (incompatible with shaders).
- Fast Math: Turn On for slight FPS boost.
- Smooth FPS: Enable to reduce FPS spikes.
- Chunk Updates: Set to 1 or 2 for smoother frame pacing.
- Dynamic Lights: Disable if not needed (torches in hand illuminate surroundings, cool but costly).
For Java 1.19.4+, consider Sodium and Iris as alternatives to Optifine. Sodium offers better FPS optimization: Iris adds shader support. But, not all realistic packs support Sodium’s format, so check compatibility first. Many hardware reviews and performance benchmarks from PC Gamer confirm that Sodium can deliver 20–40% better FPS than Optifine on modern CPUs.
If you’re struggling even with optimization, try a lower-resolution version of your chosen pack or switch to a lighter shader like Sildur’s Vibrant instead of ray tracing.
Pairing Realistic Textures with Shaders for Maximum Impact
Best Shader Packs for Realistic Textures
Realistic texture packs need shaders to reach their full potential. Shaders add dynamic lighting, shadows, reflections, and atmospheric effects that bring PBR textures to life. Here are the top picks in 2026:
SEUS PTGI: The king of ray tracing shaders. Path-traced lighting, realistic water, and material-accurate reflections. Requires RTX GPU. Best paired with 512×512+ packs.
Continuum RT: Another ray tracing shader with softer, more artistic lighting than SEUS. Slightly better performance on AMD GPUs. Great for cinematic builds.
BSL Shaders: The most popular non-RT shader. Excellent balance of visual quality and performance. Works on mid-range GPUs (GTX 1060+). Supports PBR textures and looks fantastic with realistic packs.
Complementary Shaders: Highly customizable, with tons of settings for tweaking lighting, shadows, fog, and color grading. Runs smoothly even on older GPUs. A safe all-rounder.
Sildur’s Vibrant Shaders: Lightweight with vibrant colors. Good for players who want shader effects without heavy performance costs. Less “realistic,” more stylized, but pairs well with balanced packs like Ultimate Immersion.
Download shaders from trusted sources (CurseForge, the creator’s official site) and always match shader versions to your Minecraft release.
Configuring Shaders for Photorealistic Graphics
Installing shaders is the first step: tuning them is where the magic happens. Most shader packs include in-game settings menus (accessed via Options > Video Settings > Shaders > Shader Options).
Key settings to adjust:
- Shadow Resolution: Higher = sharper shadows. Set to 2048 or 4096 for realism. Costs FPS.
- Shadow Distance: How far shadows render. Match this to your render distance for consistency.
- Ambient Occlusion (AO): Adds subtle shadows in corners and crevices. Essential for realistic depth.
- Reflections: Enable screen-space reflections (SSR) or ray-traced reflections if available. Makes water and glass look incredible.
- Bloom and Lens Flare: Tone these down unless you want a cinematic look. Too much bloom makes everything glow.
- Color Grading: Some shaders let you adjust saturation, contrast, and tone mapping. Tweak to taste, realistic packs look best with neutral or slightly desaturated palettes.
- Fog and Atmospheric Effects: Enable volumetric fog for moody, atmospheric scenes. Can hurt FPS in dense forests.
Save custom profiles for different scenarios: one for gameplay (performance-focused), one for screenshots (max quality). Most shaders let you copy and rename profiles in the config folder.
Common Issues and Troubleshooting Tips
Fixing Texture Loading Problems
Realistic packs sometimes fail to load or display incorrectly. Here’s how to fix common issues:
Textures appear blurry or low-res:
- You haven’t enabled the pack in the Resource Packs menu, or it’s loaded below another conflicting pack. Move it to the top of the active packs list.
- Mipmapping is set too high. Lower it in Video Settings > Quality.
Textures are missing (purple/black checkerboard):
- The pack is outdated or incompatible with your Minecraft version. Download the correct version.
- Optifine isn’t installed, and the pack requires it for certain features.
Connected textures not working:
- Optifine isn’t installed or enabled.
- The pack’s CTM (Connected Textures Mod) files are broken. Check for updates or re-download.
White or glitchy blocks:
- VRAM is maxed out. Lower texture resolution or close background apps.
- Shader conflict. Disable shaders temporarily to isolate the issue.
If all else fails, delete and re-download the pack. Corrupted downloads are surprisingly common.
Resolving Performance Drops and Lag
Performance issues with realistic packs usually boil down to insufficient VRAM, poor RAM allocation, or demanding shaders.
Stuttering/frame drops:
- Allocate more RAM to Minecraft (see earlier section).
- Lower render distance to 10–12 chunks.
- Disable dynamic lights and unnecessary Optifine features.
- Close background apps (browsers, Discord, streaming software).
Crashes or “Out of Memory” errors:
- Not enough RAM allocated. Increase the
-Xmxvalue in your launcher profile. - VRAM exhausted. Lower texture resolution or use a lighter shader.
Long load times:
- Use an SSD. Realistic packs load gigabytes of texture data: HDDs cause painfully long waits.
- Preload chunks: fly around your world in creative to cache textures, then switch to survival.
Low FPS even on good hardware:
- Update GPU drivers. Nvidia and AMD frequently release driver updates that improve Minecraft performance.
- Disable “Use VBOs” in Optifine (rare, but some setups run better with it off).
- Try Sodium + Iris instead of Optifine for better FPS.
Monitor GPU/CPU usage with MSI Afterburner or Task Manager. If GPU usage is below 90%, you’re likely CPU-bottlenecked, lower entity counts, redstone contraints, or nearby mob farms.
Conclusion
Realistic Minecraft texture packs in 2026 offer a visual transformation that’s hard to overstate. Whether you’re chasing full photorealism with ray tracing or just want a grounded, detailed look that enhances immersion, there’s a pack that fits your hardware and playstyle. The barrier to entry has lowered, mid-range GPUs can now handle 256×256 or even 512×512 packs with lighter shaders, and tools like Optifine and Sodium make installation and optimization more accessible than ever.
The key is matching your ambitions to your specs. High-resolution packs paired with ray tracing shaders deliver jaw-dropping visuals but demand serious hardware. Balanced packs like Ultimate Immersion or mid-tier Stratum builds offer realistic aesthetics without the performance penalty, making them ideal for survival players and content creators who need stable FPS.
Don’t skip the optimization step. A well-tuned setup with proper RAM allocation, Optifine tweaks, and smart shader configuration makes the difference between slideshow and smooth 60 FPS gameplay. And remember: realistic textures are just the foundation. Shaders bring them to life, so experiment with different combinations until you find the look that clicks.
Minecraft’s beauty is that it’s endlessly customizable. Whether you’re building a fantasy castle, a modern city, or exploring procedurally generated landscapes, realistic texture packs let you see your world, and your creativity, in a whole new light.


