Whether you’re setting up a survival world or perfecting your creative realm, a well-designed barn is one of the most practical and visually satisfying structures to construct in Minecraft. A barn serves multiple purposes, it’s a storage hub, a gathering point for your livestock, and a showcase for your building skills. Players often overlook barns in favor of grander builds, but they’re essential for efficient farming operations and can become genuinely impressive architectural pieces. This guide walks you through every step of building a functional, attractive barn that fits your Minecraft world, covering materials, layout strategies, and design styles that work across different biomes and playstyles.
Table of Contents
ToggleKey Takeaways
- A Minecraft barn serves as the backbone of efficient farm operations, consolidating animal storage, crop protection, and equipment organization in one purposeful structure.
- Gather 200+ blocks of primary materials (wood, stone, or terracotta) and prepare a 20×30 block flat area before construction to maintain building momentum and prevent alignment issues.
- Create a sloped roof using stairs at a 45-degree angle with a central ridge line and 2-3 block overhang to achieve the iconic barn silhouette that defines a Minecraft barn.
- Organize your barn interior into distinct zones: animal pens (6×6 sections per livestock group), storage areas for crops and supplies, and workspace with crafting tables for maximum functionality.
- Adapt your barn design to match your biome and playstyle—use red terracotta for classic barns, mixed woods for cottage-core aesthetics, or smooth stone for minimalist designs that feel intentional and cohesive.
- Add cosmetic details like cupolas, lantern lighting, trapdoor windows, and contrasting materials to transform a functional storage building into an impressive architectural centerpiece.
Why Build A Barn In Minecraft
A barn isn’t just eye candy, it’s the backbone of any serious Minecraft operation. Players running a Minecraft farm need somewhere to consolidate animals, store hay and crops, and organize equipment. Beyond function, a well-built barn transforms your base from scattered chaos into a cohesive, purposeful space.
Barns also unlock creative building opportunities. Whether you’re working with wood, stone, or a hybrid design, you can experiment with rooflines, overhangs, and details that look far more impressive than a plain box. Many players find that once they build their first barn, they start incorporating similar structural elements elsewhere, it’s a gateway into more ambitious construction projects.
For players focused on Minecraft farm efficiency, a centralized barn simplifies everything. Animals stay organized, crops get protected from mobs, and you’re not running across your world looking for resources. It’s the difference between a functional base and one that actually feels lived-in.
Essential Materials And Preparation
Before you break ground, gather the right materials. Your barn’s construction depends heavily on the primary material you choose, wood is the classic choice, but stone, terracotta, and even concrete can work depending on your aesthetic.
Primary structural materials:
- Wood planks (oak, spruce, birch, or dark oak depending on climate and Minecraft biomes in your area)
- Full wood blocks for support
- Stairs and slabs for roofing detail
- Fence posts for interior divisions
Secondary materials for detail:
- Trapdoors (add depth and realism to barn doors)
- Buttons and levers (functional controls)
- Lanterns or soul lanterns (lighting without fire risk)
- Hay bales (thematic and practical for animal pens)
The key is gathering enough, a barn isn’t a small build. Estimate 200+ blocks for a medium-sized structure, scaling up for larger designs. Collect materials before you start: stopping mid-build to farm trees kills momentum.
Prepping your site matters too. Clear a flat area roughly 20×30 blocks if you’re aiming for a standard barn footprint. Establishing a foundation area first prevents weird alignment issues and saves frustration later.
Step-By-Step Barn Construction
Building The Foundation And Walls
Start with a clear, level base. Build your foundation perimeter using full blocks (oak or spruce wood blocks work well). A 15×25 block footprint gives you plenty of interior space without becoming unwieldy.
Lay out the foundation in a rectangle. Once the outline is set, fill in the interior to create a solid base, this prevents mobs from spawning inside later. Add a small step up (about 1 block high) around the perimeter to suggest a proper foundation.
Now build the walls. Use a combination of full blocks and stairs to create texture. For a classic wooden barn, alternate full blocks with wooden stairs on every other row. This creates shadow lines that make the structure pop visually. Walls should be 4-5 blocks high for proper proportions, tall enough to feel spacious inside, not so tall that it looks like a watchtower.
Add a large barn door on one side. The door should be 3-4 blocks wide and 4 blocks tall. Use wooden trapdoors to frame the door opening, then leave the center clear. Some players place double doors for a more authentic look, two 2-block-wide doors side by side. Frame the door with contrasting wood or stone to make it a focal point.
Leave gaps in the walls strategically. Windows made from trapdoors (opened halfway) or wooden fence posts create ventilation and sight lines without looking wrong. Space windows every 4-5 blocks along the longer walls.
Creating The Roof Structure
The roof is where barns get their iconic silhouette. A sloped roof is essential, flat roofs look incomplete and miss half the visual appeal.
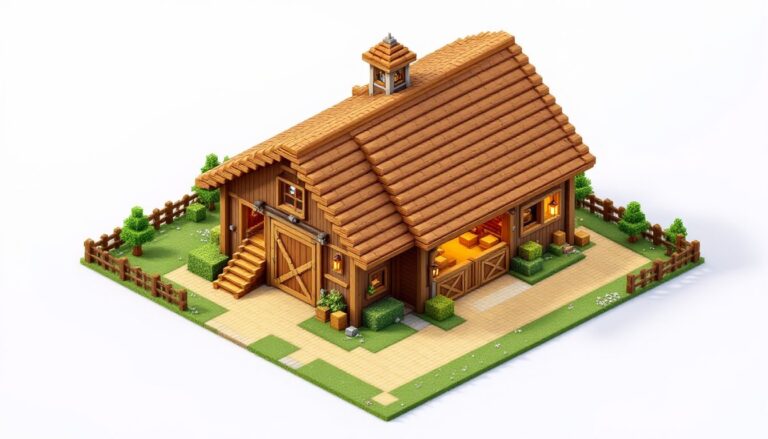
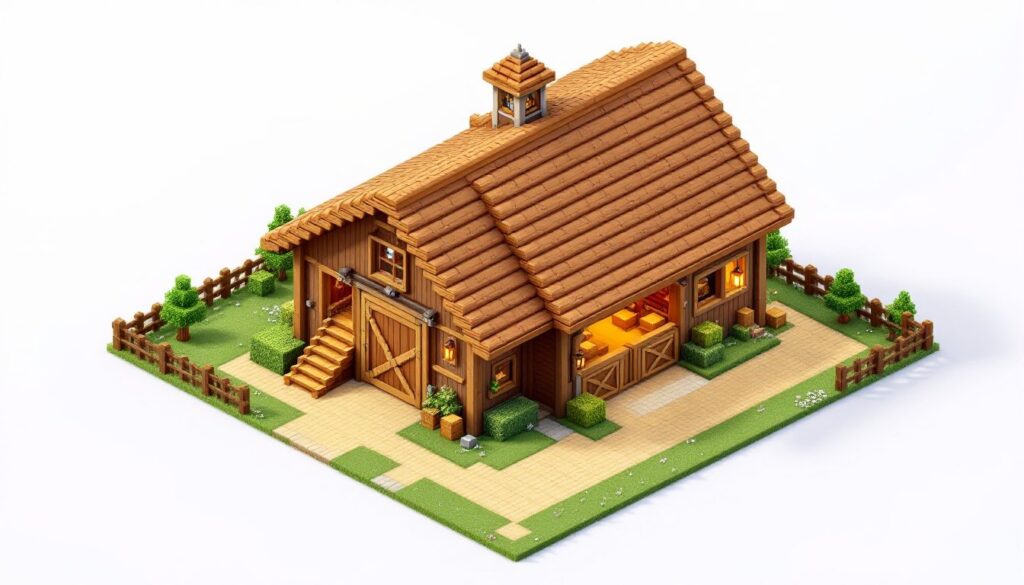
Start by placing a ridge line of full blocks down the center of your barn, one block above the top of your walls. This is your peak. From this ridge, build stairs descending on both sides at a 45-degree angle. Stairs create that classic sloped-roof effect without requiring complex block placement.
Work systematically: place stairs on one side, mirror them on the other. Overlap slightly where they meet the walls to ensure full coverage. Your goal is a triangular cross-section that extends the barn’s full length.
Add overhang by extending the stairs out 2-3 blocks beyond the walls. This shelters the walls from rain (in-game weather doesn’t actually break blocks, but the overhang looks more authentic). Finish the overhang edges with stairs oriented outward, then close the gable ends with wood to complete the triangular shape.
Consider adding a cupola, a small tower on the roof peak. It’s cosmetic but instantly recognizable as “barn.” Build a 3×3 structure on top of the roof, about 6 blocks tall, with openings on all sides. Cap it with a pyramidal roof using stairs. Many players leave the cupola open or add a fence around the top to suggest ventilation.
The roofing process takes time, but this is where your barn transitions from “wooden building” to “actual barn.”
Interior Layout And Organization
Inside, organization separates a functional barn from a cluttered one. Divide the interior into zones: animal pens, storage areas, and workspace.
Animal pens: Create separate enclosures for different livestock. Use fence posts or walls to divide sections. Each pen should have hay bales (both for feeding and aesthetics) and enough space for animals to move around. A 6×6 section comfortably holds 10-15 animals. Leave pathways between pens so you can move around without tripping over mobs.
Storage: Designate an area with chests and barrels for hay, seeds, and tools. Organize by item type, crops in one corner, breeding supplies in another. This is where cool Minecraft seeds or tool collections stay organized and accessible.
Workspace: Leave an open area for crafting, sorting, or general activity. A few crafting tables and a furnace here make the barn functional beyond just storage.
Add lighting throughout using lanterns, soul lanterns if you’re going for that authentic rustic vibe. Avoid torches: they don’t fit the barn aesthetic. Hang lanterns from the ceiling or place them on posts for ambient lighting.
Consider a loft accessed by stairs or ladder. The upper level can serve as bonus storage or a hideout spot. Many players add hay bales as pseudo-furniture to make the loft feel cozy.
Popular Barn Design Styles
Barn design varies wildly depending on theme and Minecraft farm goals. The classic red barn with white trim is iconic, use red terracotta or concrete for walls and white concrete or snow blocks for accents. Pair it with a dark wood roof and white fence posts around the exterior.
A cottage-core barn leans into warmth and irregularity. Mix different wood types (oak, spruce, birch), add exposed beams on the exterior, and soften edges with stairs and slabs. This style works beautifully with surrounding landscaping, gardens, flower patches, and pathways enhance the whole vibe.
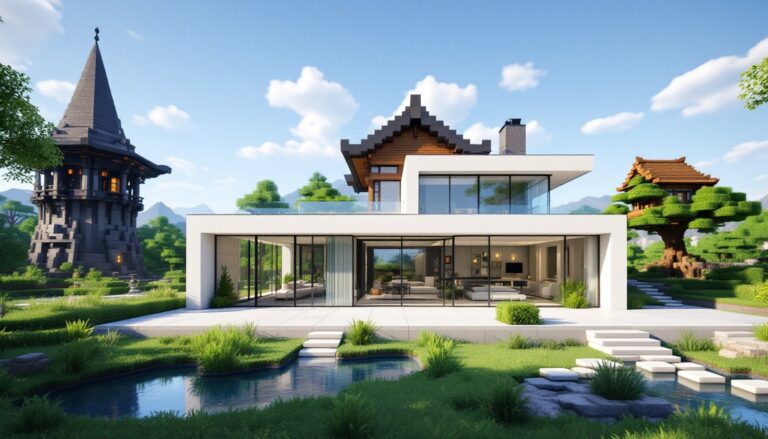
Modern minimalist barns use smooth stone, polished blackstone, or concrete. Clean lines, large rectangular windows, and minimal roof overhang define this aesthetic. It’s less traditional but works if your world has a contemporary feel.
For players building across different Minecraft biomes, adapt materials to your environment. A jungle barn uses stripped dark oak and incorporates vines. A desert barn uses sandstone and terracotta. A snowy barn pairs spruce wood with snow and ice for cohesion. Matching your barn to its surroundings creates a sense of intentional design.
Many builders reference barn design guides available online for inspiration before building. Don’t copy exactly, but studying proportions, roof angles, and material combinations saves trial-and-error time. The gaming community on platforms like Nexus Mods and Game Rant also shares Minecraft farm and build tutorials worth checking out for advanced techniques and creative inspiration.
Final Thoughts
Building a barn in Minecraft rewards patience and planning. You’re not just constructing a storage building, you’re creating the heart of your farm operation and a structure that reflects your building style. Start with solid fundamentals: clear foundation, properly proportioned walls, and a roof that defines the silhouette. From there, interior layout and cosmetic details transform it from functional to genuinely impressive. Whether you’re going for authenticity, creativity, or just practical efficiency, a well-built barn becomes something you’ll be proud to show off.