Building your first Minecraft house is a pivotal moment, the difference between surviving in the dark and actually living. Whether you’re constructing a cozy cottage, a sprawling mansion, or a compact survival base, the fundamentals remain the same: smart location selection, proper material gathering, thoughtful design, and execution. This guide covers everything you need to know about creating a functional, aesthetically pleasing MC house that’ll make you proud to log in. From choosing your biome to adding the final decorative touches, you’ll learn the exact steps builders use to transform raw terrain into an actual home. Ready to stop living in a dirt hole?
Table of Contents
ToggleKey Takeaways
- Choose a Minecraft house location with balanced resource proximity and terrain flatness to avoid long-term frustration and constant material gathering.
- Master essential tools and core materials—wood, stone, glass, and lighting blocks—before building to prevent mid-project resource crunches.
- Design your house layout on odd dimensions (7×9, 9×11) and raise the foundation 1 block above ground to prevent mob glitches and improve aesthetics.
- Combine primary and secondary building materials with stairs, slabs, and trapdoors to add visual depth and break up flat walls in your Minecraft house.
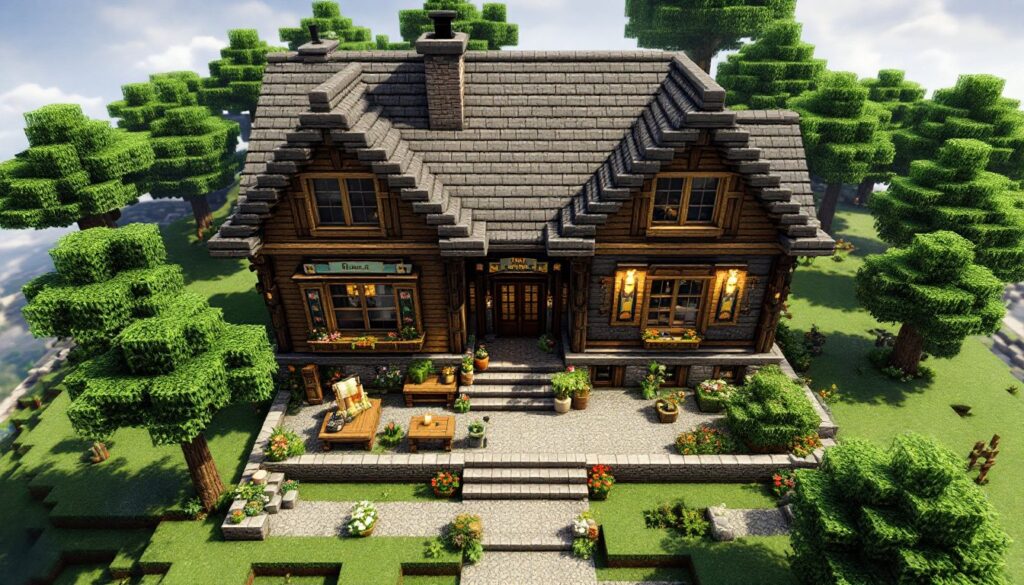
- Invest in roofing design and exterior details like chimneys, porches, and contrasting materials—the roof is the most visible element and sells your entire build.
- Finish with thoughtful landscaping, window framing, and decorative touches like banners and flower pots to transform a functional box into a lived-in home.
Choosing Your Minecraft House Location And Biome
Your location determines everything, how fast you gather resources, how often you deal with mobs, and whether you’ll actually enjoy building here long-term. A poor location means constant walking, scarce materials, and frustration. The best spots balance accessibility with safety.
Resource proximity matters more than aesthetics. Trees provide wood and fuel: water enables farms and fishing: exposed stone and caves offer ores without mining deep. Look for areas with all three nearby. Flat or gently rolling terrain is ideal because you won’t waste hours terraforming before you even start the house itself.
Biome selection shapes your build’s character and resource availability. Plains biomes are the default choice, flat, safe, full of animals, and often near villages for trading. Forest and Taiga biomes overflow with wood, but expect more mobs spawning under dense trees. Mountains offer stunning views and exposed ores, though building on slopes requires careful planning and extra landscaping. Desert and Badlands have minimal wood and food, making early survival harder, but they’re gold for sand, sandstone, and colorful terracotta blocks. Swamp and Mangrove biomes provide unique wood variants and clay, but the difficult terrain can be annoying. Snowy biomes spawn strays and powdered snow, slowing farming, though you’ll have access to ice and snow for building.
Choose biomes based on your build’s vision and how much extra effort you’re willing to invest. A survival builder prioritizes resources: a creative builder might pick a visually striking biome even though material scarcity.
Essential Building Materials And Tools For Your Project
Before breaking a single block, gather the right tools and core materials. Half-finished houses die because builders ran out of specific blocks or forgot essential equipment.
Tools you absolutely need:
Start with a stone or better pickaxe to gather stone efficiently. An axe speeds up wood collection dramatically. A shovel is mandatory for dirt and gravel. A hoe isn’t essential but saves time on farms. Keep a sword for emergencies. Shears cut leaves and wool cleanly. A bucket handles water and lava. Flint and steel ignites campfires. Torches prevent hostile spawns, bring stacks.
Set up a crafting table and furnace near your build site immediately. A blast furnace smelts ore faster if you have the resources. Keep a bed nearby: dying mid-build wastes time. Chests store materials so you don’t carry everything.
Core materials to gather first:
Wood logs are foundational, collect oak and one contrasting type (spruce, birch, dark oak, mangrove, crimson, or warped). Different wood colors add visual depth and prevent monotony. You’ll need far more than you think: estimate high and gather extra.
Stone materials include cobblestone, stone bricks, smooth stone, and their associated stairs and slabs. These form walls, floors, and structural elements. Glass panes and blocks come next, crucial for windows. Don’t skip doors, trapdoors, fences, and fence gates, these break up flat surfaces and improve aesthetics. Stairs and slabs are essential for roofing, depth, and detail work.
Lighting is non-negotiable: torches, lanterns, and campfires prevent mob spawns inside and create ambiance. If you want automated doors or redstone lighting, gather basic redstone dust and repeaters early.
Decoration separates amateur houses from impressive ones. Leaves, flowers, bushes, item frames, carpets, buttons, and signs add personality without major resource investment.
Wood, Stone, And Decorative Blocks To Gather First
Prioritize materials based on your build’s aesthetic and scale.
Wood selection: Oak is reliable. Pair it with spruce for contrast, or mix in birch, dark oak, mangrove, crimson, or warped wood for unique color palettes. Stripped logs add variety, use them as vertical supports or accent stripes. Don’t use just one wood type: the monotony will kill the build.
Stone materials: Cobblestone is the foundation. Add smooth stone, stone bricks, and variants like mossy and cracked stone bricks for texture and depth. Andesite, diorite, and granite work as secondary stones for modern or mixed-material builds. Collect stairs and slabs of each type: they’re essential.
Sand and derivatives: If near a desert, grab sand for glass production. Sandstone and red sandstone are beautiful building blocks. Concrete and terracotta offer color variety unmatched by standard blocks, if your build uses color, these are worth gathering.
Decorative essentials: Flower pots, item frames, banners, and signs personalize your house with minimal resource investment. Dark oak leaves or spruce leaves create natural landscaping. Buttons and trapdoors add window trim and architectural detail. Carpet tiles layer on floors for coziness.
Focus on gathering in waves, core materials first, then decorative refinements. You can always go back for more, but starting with the right basics prevents mid-build resource crunches.
Designing Your House Layout And Foundation
Before placing a single block, sketch your layout. The builders behind impressive Minecraft houses always plan first. Define what your house must contain: sleeping quarters, storage, crafting station, smelting area, farm access, and animal pens. Each function needs dedicated space.
Start with a simple floor plan using odd dimensions like 7×9, 9×11, or 11×13. Odd widths make centered doors and symmetrical windows easier. Think of it as dividing the house into functional zones, sleeping area on one side, crafting and storage on another, entrance in between.
Raising the foundation is critical and often overlooked. Build your floor 1 block above ground level. This prevents mobs from glitching into your house during the night and gives you room for a porch or raised entry. Use a different block for the raised platform so it’s visually distinct from ground-level surroundings.
Floor materials should contrast with walls. If your walls are wood planks, use stone or dark wood for the floor. This visual separation makes the interior feel more defined and intentional. According to building guides on Minecraft Bed Ideas: 50+ Creative Designs, interior layout directly impacts how your build feels, tighter, more organized spaces feel cozier and more functional.
Plan for expansion. Leave space for a basement, upper floors, or side wings. A 9×9 main house can accommodate a 5×5 extension without major reconstruction. Future you will thank you.
Structural Planning And Dimension Considerations
Structural integrity keeps your house from looking like a cheap cardboard box.
Wall support: Use vertical logs or stripped logs at corners and every 3–5 blocks horizontally. These aren’t just decorative, they break up flat walls and provide visual rhythm. A 7-block wall with supports at blocks 1 and 5 looks intentional, not accidental.
Interior height: Most houses feel comfortable with 3-block interior height (player height is roughly 1.8 blocks, so 3 blocks gives headroom without wasting space). Going 4 blocks tall creates a more grand, open feel. Don’t go lower than 3, it’ll feel claustrophobic.
Window and door proportions: Odd widths align naturally with centered openings. A 7-block-wide wall lets you center a door or window trio. A 9-block wall centers a large feature with supporting details on either side. This isn’t accident: it’s intentional design.
Light levels prevent spawns: Any interior block at light level 0 spawns mobs. Ensure torches or lanterns reach every corner. A torch every 12–15 blocks horizontally maintains safety while looking intentional rather than overdone.
For inspiration on multi-floor complexity, Minecraft Elevator guides show how builders handle vertical spaces efficiently, applying those principles to stairwells and upper floors makes navigation feel smooth.
Building Walls, Roofs, And Exterior Details
This is where your house transforms from a box into an actual building.
Walls need depth and variety. Combine a main block (wood planks or stone) with secondary materials (logs, stripped logs, stone bricks). Use stairs, slabs, trapdoors, and fence-post details to break flat surfaces. A wall of solid oak planks is boring: a wall mixing oak planks, dark oak logs, and oak stairs is interesting.
Windows make huge visual impact. Recessed windows (set 1 block back into the wall) look intentional, not pasted on. Frame them with logs, stairs, or trapdoors on all sides. Window size matters, aim for 1-2 blocks wide by 1-2 blocks tall. Larger windows look modern: smaller, framed windows feel cozy.
Exterior details sell the build. Porches raise the entry and add character. Balconies extend upper floors. Overhangs shade windows and create depth. Awnings over doors provide shelter. Paths connecting the house to farms, villages, or other structures tie the landscape together. Use contrasting materials, gravel paths against grass, dirt paths against stone foundations.
Landscaping completes the picture. Plant trees or bushes around the foundation. Create flower beds near the entrance. A small pond or water feature adds visual interest. These touches tell a story: this isn’t a random box: someone lives here.
Roofing Styles And Aesthetic Finishing Touches
The roof is arguably the most visible element of your Minecraft house. Get it right, and your build stands out. Get it wrong, and everything else falls flat.
Gable roofs are the easiest and most common. Two sloped sides meet at a peak, created using stair blocks. An 8-block-wide house needs stairs angling inward from block 1 and block 8, meeting in the middle. Stair blocks lean at 45 degrees, creating that classic look. Gable roofs work with almost any build style.
Hip roofs slope on all four sides, meeting at a point or ridge. They’re more complex but look more compact and sophisticated. Hip roofs suit larger, more intentional builds.
Curved or fantasy roofs use alternating stairs and slabs to create arcs or domes. These demand precision but produce striking results, think fantasy cottages or wizard towers.
Flat roofs suit modern builds. Add parapets (1-2 block walls around edges), plants in pots, or skylights to avoid monotony. Flat roofs look intentional and clean.
Color contrast is essential: if your walls are oak planks, roof in spruce stairs or dark oak. Contrast makes the house pop. According to 30+ Minecraft Kitchen Ideas, interior detail and exterior finishing work together, a beautiful kitchen framed by a distinct roof tells a complete story.
Finishing touches elevate everything else:
Chimneys aren’t functional but are iconic. Stack cobblestone or dark oak logs and place a campfire on top, the smoke effect makes it look lived-in. Add chimneys even if they don’t connect to furnaces: they’re pure ambiance.
Use stone variants, mossy stone, cracked stone bricks, weathered copper, sparingly to suggest age or wear. Stripped logs and regular logs mixed in walls create visual variety without looking chaotic.
Banners, flower pots, and item frames personalize areas. Place a banner above the door. Put potted plants on window ledges. Frame valuable items on walls. These touches transform a house into a home.
Final check: Step back and view your house from a distance. Does the overall silhouette feel intentional? Are there blank walls that need breaking up? Is lighting balanced? Small tweaks at this stage compound into a professional-looking build. For inspiration on how larger structures coordinate details, Minecraft Villager House guides explore how functional spaces integrate with aesthetic design, those principles apply directly to your personal house.
Final Thoughts: Your Minecraft House Awaits
Building an amazing Minecraft house isn’t about having infinite resources or spending weeks perfecting every detail. It’s about understanding the fundamentals, location, materials, layout, and finishing touches, then executing with intentionality. Start with a solid foundation and plan, gather materials wisely, and invest time in details that matter: wall variety, framed windows, contrasting roofs, and thoughtful landscaping. Your MC house becomes the anchor point for everything you build afterward. It’s worth getting right. Now get out there and build something you’ll actually want to live in.


